

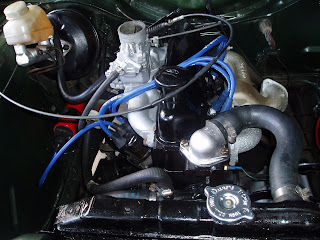
Back to the engine bay & a number of hours were spent cleaning, removing small rust spots & fish oiling. I also had to strengthen the base of the battery tray as there were a number of rusted areas. I riveted a small piece of sheet metal over the existing tray and that made it much more acceptable. Hart’s Auto Paints at Slack’s Creek was able to mix up several spray cans of jewel green and that should be sufficient for the engine bay. These which were a pretty good match and the engine bay looked much better. After covering all the openings on the block & giving it a good clean, I gave the block & all the lower engine bits several coats of black engine enamel. The section in front of the radiator was also sprayed black. All the engine components were cleaned and then painted either with the black or silver enamel. After a good look at the valves, I decided to leave them & this was a decision I was to regret later. It was all starting to look pretty good & so all I had to do was to put the engine back together & hopefully it would go.

The cylinder head went back on without any major dramas and with many new bits (thermostat, hoses, plugs, points, leads) it was all starting to look pretty good. Even though I really wanted a set of extractors, I cleaned the exhaust manifold & painted it with silver engine enamel & like other parts, it looked OK. The new fuel pump took several attempts to get the correct part but I am glad that was replaced considering the problems I had experienced with the fuel system. The carbie had also been cleaned & also given a spray of silver paint. Apart from connecting the heater hoses, everything was cleaned, painted or renewed & so the engine area was looking pretty respectable – even if I say so myself! There was still one major problem – what was I going to do with the sump plug? It was now the end of January 2009 and although I had the engine back together, I had not had it running due to the sump plug issue.

At this stage, before the engine was running I was keen to connect up all the heater hoses but I had not removed the heater box or the wipers, so that was my next task. Both the heater fan & the wipers did not appear to be working so I dissembled the heater box which had stacks of rubbish in it. The cowling area in which the fan sits into the body & under the front vents had enough rubbish for a chook house! The heater radiator seemed in good condition & there were no obvious leaks but lots of dirty water came out after a good housing out. On taking out the fan motor, I noticed several of the armature wires were broken so there was a pretty good chance it was stuffed. Removing the wiper assembly was not my favourite task and I also unscrewed the wiper motor. There is a lot more to the wiper assembly which I will refer to again later. I took both motors to my local auto electrician who tested them with the wiper motor being OK but the fan stuffed. He was confident that it could be fixed in a few days, so I left it with him.

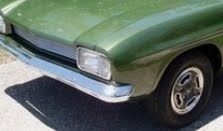
It was mid February before I could get back onto the Capri & I reconditioned the heater box but I still didn’t have the fan motor back so I couldn’t really put that back. To get the engine running, I really needed to fix the sump plug problem. I had read that by cleaning out the thread it may be possible to use a new plug so I purchased a ½ inch thread set & that worked well. I was at Autobarn (MacGregor) talking to a young guy there about the problem. He suggested I try an oversize plug as he had done the same with his EH Holden and had not had any leaks for 5 years. So, I bought one for $5. It screwed in pretty tightly and I was very anxious about whether it would leak considering all the time I had spent on fixing this problem. Time for all the oil and then to get some fuel through to the carbie. After a few turns, I noticed a huge pool of oil on the floor – great!! Guess what? It wasn’t the sump plug but the oil filter. Unscrewed it a put a few winds of pink tape on top of the gasket & tried again. Not so much oil but still leaking so a few more winds & then tightened it really tightly & it seemed OK. It would appear that some brands of filters have a different shape surrounding the rubber seal & this is different to my 72 XL. After changing the leads to the correct firing order (1243), it fired up but it was very noisy but as the oil started to flow, it settled down quite a bit. Just a small leak from the top radiator hose & it is starting to sound OK. This was all a bit of a relief and I put me in a pretty positive frame to start attacking the bodywork as I wanted to have the car at least mobile so I could put it in different positions in my garage & yard.
LESSON 11A: A $5 oversized sump plug may get you out of a lot of trouble.
LESSON 11B: Check the rubber seal & the shape of the ridge on the oil filter as some brands are different and, again, the pink plumber’s tape can be very useful in helping the seal.


No comments:
Post a Comment