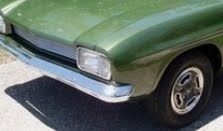


 Several rust areas needed bogging up and there were a couple of small dents on the back corners as well as the one on the driver’s door. The main areas that needed work were the area directly under the RH headlight and the front undertray. Again, after spending considerable time on one section I would think it was pretty straight & even only to find it would need another layer of bog and another sanding. This was especially the case on the undertray. I spent most of the time I had available in May doing this but there were a couple of small areas that I think I was making worse & decided to leave these to Steven L to finish off to his standard.
The rest of June was spent cleaning & repairing all the exterior & interior trim. The dash panels look quite good but the instrument panel will need a work over. The interior trim came up really well with a good clean & some Armorall. A small section of the back seat will need replacing as will a side section of the driver’s seat. Both front seats need some new foam & webbing but apart from that the seats were really good. The back parcel tray was surprisingly good but I strengthened parts of it with some fibreglass sheeting. The front parcel tray was OK & looked like it had been repaired at some time but also needed some work. The front bumper bar was a bit bent & would need straightening but getting the bolts from the brackets was another challenge & I had to grind most of them off.
With time on my side while the car was away at the paint shop, I decided I would try and do as much of the seat refurbishment as I could. It took ages getting all the staples from the back seat & then the front seat was completely different from my 1972 Capri. Again, a lot of patience is required if you really don’t know what you are doing. I then visited Jobsons Upholsterers at Dutton Park to get them to replace the damaged sections of vinyl. They has done some work for me before on my white Capri & I find the work is quite good & the price reasonable. They also sold me a length of rubber webbing to use under the front seat and gave me some staples to use in the process.


LESSON 16: Don’t attempt to repair the seats unless you have plenty of time. It takes ages getting all the staples & ties out & even longer to put them back. Leave one front seat in the car if you want to be able to move it about.
LESSON 16A: If you are going to do this, go to Bunnings & buy a set of staple pliers ($14) that they use for chain wire fencing. The staples fit in the end of the pliers & make the job so much easier.

No comments:
Post a Comment