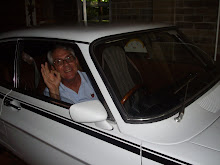
Any remaining exterior trim was removed, including the chrome around the back windows & the door handles. I needed to buy a long handled screw driver for this but note that one screw only needs to be loosened & not totally removed.
I continued to clean, paint & fish oil the rear section of the car & had a good look at the rear brakes. With a good clean & some black paint, they seem OK & I will leave the present linings on as they seem legal. The cylinders don’t appear to have any leaks which is very fortunate.
4 January 2009 & my first task for the year involved the master cylinder & front discs. The master cylinder looked reasonably new & with a little cleaning, it looked pretty good. Both front callipers were removed easily & the pads looked quite new also. With a good cleaning & a few coats of black engine enamel, they look pretty good also. The big drama & there always has to be one, was when I tried to loosen the LH bleeder screw. It would not budge & when it finally did, the top half broke off. Great! Just what I needed! How the hell was I going to get the rest out? After some very careful drilling & the use of a bolt extractor, the remainder came out. Now where do you get a replacement bleeder screw? I then remembered that I had a spare calliper deep in my treasure chest & after finally locating it was pleased that it had the bleeder screw intact. It was pretty tight & again with the use of litres of RP7. I gave it a bit of a tweak & guess what? Yes, the top of it broke off too!! Bugger, bugger, bugger!!
A new bleeder screw was not a great drama and All Brake & Clutch at Rocklea were quite helpful. I reassembled the whole brake system and proceeded to flush out the entire system. I opened the bleeder screw on the LH rear but no fluid was coming out but then I noticed a big puddle of brake fluid on the floor under the front LH calliper. What the f**** was going on? I had tightened that screw. It was supposed to be coming out of the back LH cylinder not the front! After a lot of muttering and thinking, I realised what may have happened. In my attempt to drill out the broken bleeder screw, I may have slightly damaged the side of the calliper thread. After a good night’s sleep and a few winds of pink plumber’s tape on the bottom of the bleeder screw, the leak has stopped. That was a relief & I hope it remains that way. But still there was no fluid coming out of the back bleeder screw, so what is going on? I removed the bleeder screw & out came all the fluid so that resulted in a real good flush out. What had happened was that the small channel in the middle of the screw was completely blocked. Wasps again I suspect! With this all cleaned, the brake fluid came out the right place & I was eventually able to attempt to bleed the brakes. I enlisted the assistance of my good wife to do this but after about ten minutes of me trying three different bleeder screws, the pedal pressure was no different. What was wrong? After I had pumped the pedal a few times, she started laughing as she had been pumping the accelerator!!! We tried again and some pressure was obvious but it is still not good enough. A few days later I asked my good friend, JR, to help in the bleeding process & after several circuits around the three bleeding points, the pressure is there & it is getting quite acceptable.
LESSON 9A: Be careful removing rusted bleeder screws as they tend to break off at the top section.
LESSON 9B: Be even more careful drilling out broken bleeder screws as it may result in damage to the inner thread.
LESSON 9C: When you wife assists in bleeding the brakes, ensure that you explain carefully which pedal has to be pressed in!!!
Wednesday, 3 February 2010
Subscribe to:
Post Comments (Atom)


No comments:
Post a Comment